Wednesday, 30 November 2011
Sourdough starter day 6
Being 1 day behind on this starter has slightly put me out of kilter, but I'm just about remembering where I'm up to. Today I managed to follow the instructions right; discard most of the starter again, leaving about a tablespoon, and add to this 70g strong white bread flour, 30g rye flour and 100g water. I won't bother adding a picture because there isn't much to see. It's still a little bubbly, fairly stringy and smells like yoghurt. The feeding continues
Tuesday, 29 November 2011
Sourdough starter day 5
All that talk of not messing up my sourdough starter and I find out I'm actually off track. I fed it yesterday as I'd fed it the day before but I've checked my instructions again today and I was actually meant to do it differently. Whoops! So I'm a day behind, but I'm hoping it won't have affected it too much.
So, what was I meant to do yesterday and have actually done today? Well, I was meant to throw away most of the starter... it felt a bit weird throwing it out but I followed the instructions through. To this, I added 70g strong white bread flour, 30g rye flour and 100g water. I stirred, covered and put it back in its spot.
I'll keep a better eye on what I'm meant to be doing in future.
Monday, 28 November 2011
Sourdough starter day 4
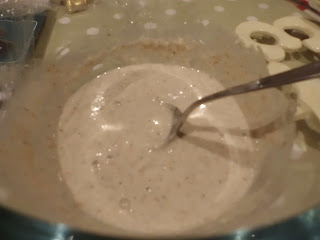
Yep, I'm now fairly sure that we have life. Not only are the bubbles sticking around but it's starting to smell a bit like yoghurt and has a sort of stringiness about it when you lift the spoon out; it doesn't just flow but has a certain viscosity to it. We have a sourdough starter! But I'm going to continue to follow the instructions I've got. No point messing it up at this early stage.
Sunday, 27 November 2011
Rosemary and seasalt focaccia
After getting back from work and eating my tea today, it was time for some baking! No sitting around while my sourdough starter gets going; I have fresh yeast in the fridge and, apparently, people who want bread!
I made rosemary and seasalt focaccia for the first time the other day and it went pretty damn well. Mum took some into work and it proved so popular, I've had a request for some more. Here's how I made it, following a recipe by Paul Hollywood
Ingredients
500g strong white bread flour
2 teaspoons sea salt
32g fresh yeast (or 14g fast action dry yeast)
2 tablespoons olive oil
400ml cold water (I saw this instruction and was worried by the "cold", but fear not; the yeast still gets going)
2 sprigs rosemary, stripped and finely chopped
Olive oil, sea salt and rosemary fronds, to finish
Method
- Put the flour, salt and yeast in a large mixing bowl (put the salt on one side of the bowl and the yeast on the other; direct contact in concentrated amounts may make the salt kill the yeast). If using fresh yeast, rub this into the flour
- Add the 2 tbsp olive oil and 300ml of water and stir gently to combine into a dough
- Knead for 5 minutes in the bowl, gradually incorporating the rest of the water. The dough will become very sticky, but this is meant to happen. I found kneading at this stage easiest by using and circular motion around the edge of the bowl, followed by a cutting motion through the middle of the dough to stretch it. I then turned the bowl slightly and repeated
- For the next 5 minutes (still in the bowl), pull a side portion of the dough and push it into the middle. Work round the side until you get back to where you started, then turn the bowl and repeat
- Turn the dough out onto an oiled work surface and knead for a further 5 minutes. Only use olive oil to prevent it from sticking. As to kneading, you'll probably find it easiest to pull the dough to stretch it
- Place in a bowl, cover loosely with cling film or a cloth and prove until doubled in size
- Once proved, turn out onto a baking tray (it may need lining with baking parchment if you don't have a non-stick tray) and push to the edges of the tray (if it keeps springing back, let it rest for a minute or 2 before pushing it out again). Leave to prove for a second time, again until doubled in size
- In the meantime, preheat your oven at 220 degrees C (425 degrees F, gas mark 7)
- Once proved for a second time, push you fingers into the dough to create dimples. Drizzle with olive oil, dot with rosemary fronds and sprinkle generously with sea salt. Bake for 20 minutes until golden on top and it gives a hollow sound when tapped on the bottom
- Enjoy pieces dipped in olive oil and balsamic vinegar!
Recipe adapted from:
Sourdough starter day 3
The "thing" has been fed again, and again with 35g strong white bread flour, 15g rye flour and 50g water. It was still bubbly this morning and had a slightly fruity smell, so we may have signs of life!
Saturday, 26 November 2011
Sourdough starter day 2
It's been a long day at work and I arrived home about 2 hours ago having completely forgotten about my sourdough starter. Getting my scales out of the cupboard for something else luckily jolted my memory and the "thing" has been fed. I'm following the recipe from sourdough.com and the instructions for day 2 were pretty damn similar to day 1; to the bowl of mix you already have, add 35g strong white flour, 15g rye flour and 50g water. Stir and put somewhere away from any direct heat sources.
My starter essentially looks the same as it did yesterday. It's got a few bubbles coming to the surface, which could be a sign of life in the mix, but it could also be a sign that I stirred it a little bit vigorously, so I'll reserve judgement. It also doesn't smell of anything at the moment; when the bacteria starts to work, it should give off what I'll refer to as "fermenty" smells.
But these are early days so I wasn't expecting much to have happened. Still, it's a good job that I remembered to feed the starter... the experiment may have ended almost straight after it began.
Friday, 25 November 2011
Starting a sourdough starter
I've done a few types of bread before, but they've mostly been basic and made use of yeast. But there's a type of bread that doesn't use yeast and that's being talked about in many bakery circles. That's sourdough bread. Instead of using yeast, you make something known as a "starter" using flour and water. You "feed" this starter with more flour and water over the course of several days and, eventually, life will come to your starter in the form of bacteria. This bacteria is what was originally used by our ancestors to create leavened breads. The method became less popular when yeast started to be produced through industrial methods but is experiencing a bit of a renaissance.
So, what with all the bakery buzz about this method of bread production, I thought I'd give it a go. I've found a step-by-step guide to making a starter at sourdough.com and today is day one.
 I started with a clear bowl (so I can see what's going on) and a spoon, both of which I'd sterilised in hot water (to kill any of the nasty bacteria that I don't want getting into my starter). To this I added 15g rye flour (took a bit of finding but eventually got some in trusty Waitrose), 35g strong white bread flour and 50g water. I stirred, covered it loosely with cling and left it on a shelf, away from sources of heat. And that's it for the moment. It's tempting to lean in and look at it every now and again but there's no point as it's mostly just a substance a little like glue. But give it a few days and a bit of feeding and we might see some signs of life.
I'll keep you posted.
So, what with all the bakery buzz about this method of bread production, I thought I'd give it a go. I've found a step-by-step guide to making a starter at sourdough.com and today is day one.

I'll keep you posted.
The Beginning of the Dough Diaries
These are the Dough Diaries, and this is the first entry in a blog that follows the diary writer, i.e. me, in her quest to learn about and make lots and lots of bread.
I’m not a complete novice when it comes to bread making. I’m currently training to be a pastry chef and said training involves a unit on breads and doughs, so I’ve had a little practice there and a few bits of expert advice. And before that, I’d experimented a little bit myself... with varying levels of success, I’ll admit, but I still gave it a go.
But it’s more recently that I’ve become hooked on bread making. I find there’s a certain amount of satisfaction in taking the time to mix and knead bread, watch it as it proves and grows, and eventually in shaping it. And there are so many types of bread from cultures around the world that I’ve no idea how to make... but I want to know how! So what better excuse for yet another blog on food.
Subscribe to:
Posts (Atom)